Plan the placement before choosing a hook
A garland is easier to hang gently when you know its weight, length and intended shape. Lay it out first, including any ornaments, lights or ribbon you plan to add. A short, lightweight strand draped across a doorway needs different support from a full evergreen garland wrapped around a frame. If the greenery feels heavy in your hands, plan several support points rather than asking one hook to carry it all.
Look closely at the surface, too. A smooth, sound door or wall may offer more options than peeling paint, old wallpaper, textured plaster or an uneven finish. Check that the garland will not catch on a door as it opens, brush against a frequently used light switch or hang where people need a clear path. These small checks can save both the decoration and the surface beneath it.
Use the door itself for support
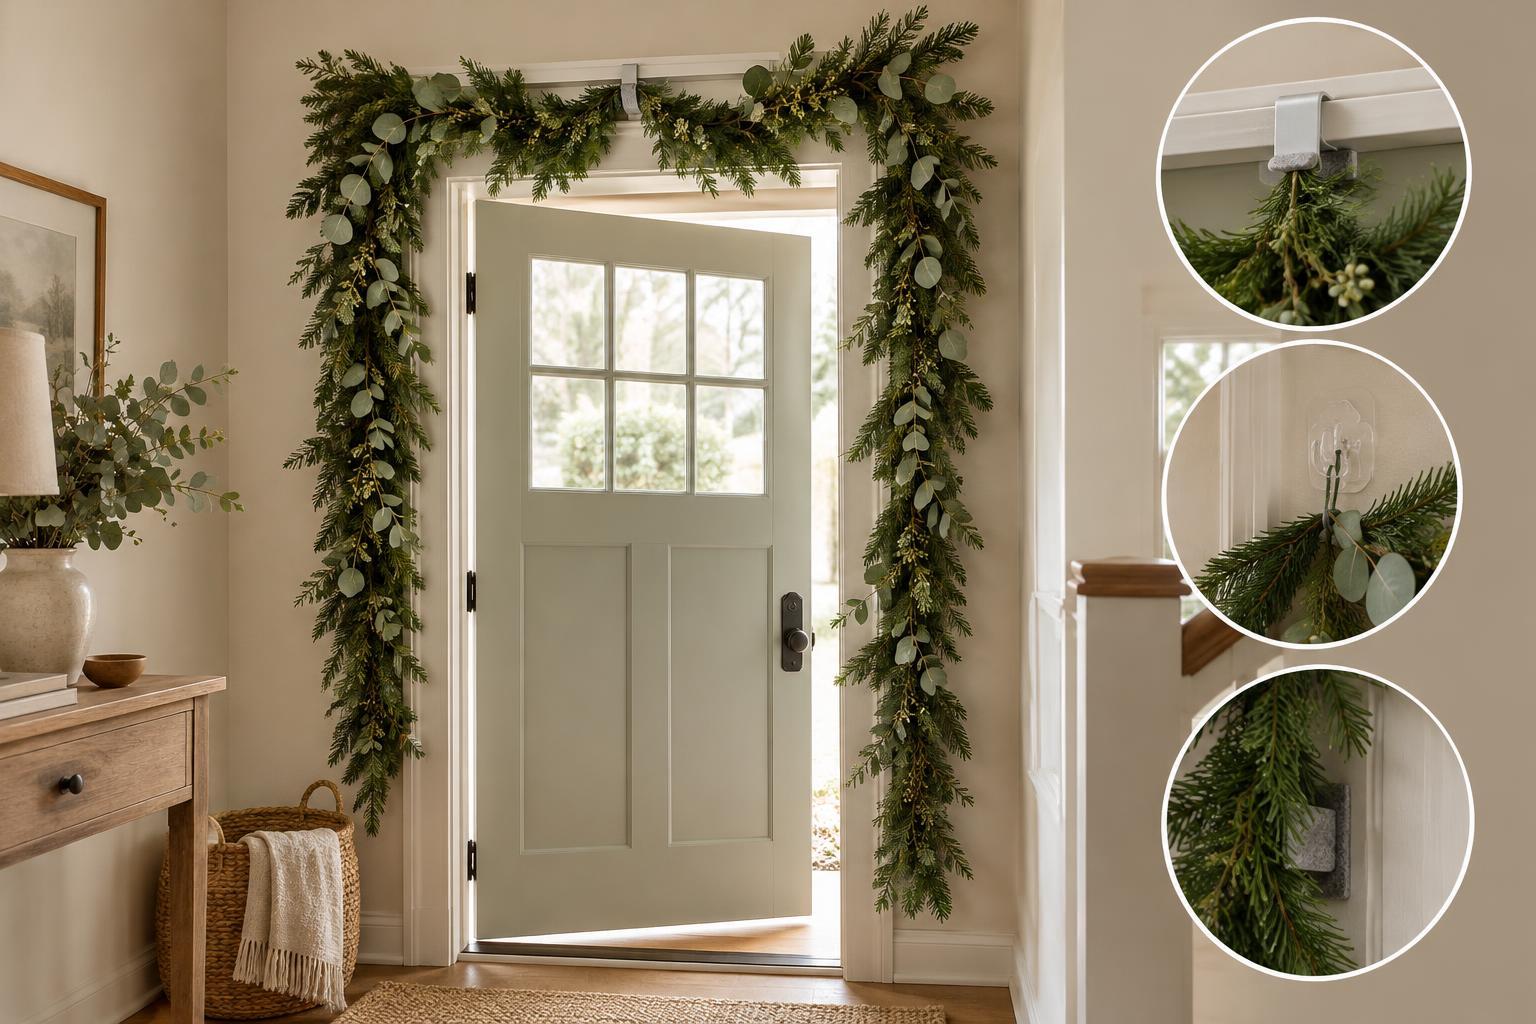
For a standard door, an over-the-door hanger can carry a garland without a nail or screw. Choose one that fits the door’s thickness, then check that the door still closes easily. A thin piece of felt or other soft padding between the hanger and the door may help prevent rubbing. Avoid forcing a tight hanger into place; pressure and repeated movement can mark paint.
If you want greenery around the doorframe rather than down the face of the door, consider tying a lightweight garland to an existing, secure feature where appropriate. Soft ribbon or fabric ties are less likely to scratch than bare wire. Do not tie anything to a handle, latch or hinge in a way that interferes with normal use. On a metal door, a suitable magnetic hook may be another option, but test its hold and place a soft barrier under it if it could slide.
Exterior doors need an extra check. Wind and moisture can loosen a setup that feels secure indoors, and some decorative materials shed or stain when wet. Keep an outdoor garland light enough for its supports and check it periodically, especially after windy weather.
Match removable supports to the wall finish
Removable adhesive hooks can work well on some clean, smooth surfaces when used according to their package directions. Check the stated weight limit and surface guidance before attaching them. Clean the area as directed, let it dry fully and give the adhesive any required setting time before adding the garland. Using several hooks lets you shape the strand while sharing its weight.
No adhesive is guaranteed to leave every finish untouched. Fresh paint, delicate wallpaper, loose paint and textured surfaces can be especially vulnerable. If a finish matters to you, try an inconspicuous spot first or choose a method that does not stick to it. When it is time to take the hooks down, follow the removal directions slowly rather than pulling them away from the wall.
Existing picture rails, sturdy curtain rods or other already-installed supports may offer a way to avoid new wall attachments. Use soft ties and make sure the fixture can bear the added weight. A tension rod can also hold a light garland inside a suitable doorway or recess, provided it is fitted securely and does not obstruct the opening.
Distribute weight and protect contact points
Instead of pulling a garland taut between two ends, let it form gentle swags supported at intervals. This reduces strain on individual hooks and often looks more relaxed. Attach the garland’s inner cord or stem to each support with soft ties, leaving a little room to adjust its shape. If you add ornaments later, spread them along the strand rather than concentrating them at one end.
Notice where greenery, wire or ornaments touch the surface. Faux branches can have firm plastic or wire tips, while fresh greenery may leave moisture or plant residue behind. Tuck rough ends inward, and use small pieces of soft padding where a support rests against a door or frame. For a mantel or shelf, set the garland back from the edge and use stable supports so it cannot be pulled down easily.
Take it down with the same care
A damage-conscious display ends with a gentle removal. Take off ornaments and lights first, then lift the garland away without dragging it across paint or trim. Remove ties and hooks one at a time, following any adhesive-removal instructions. Wipe away loose needles or dust with a soft cloth rather than scraping at the surface.
Before storing reusable garlands, check for damp spots, bent stems and sharp wire ends. Coil them loosely so they are easier to hang next season. If you keep the hooks, ties and padding together, you will have a ready-made hanging kit—and a record of what worked well in your home.